
Turn Google Sheets into live websites
Publish a sheet, add a script tag, mark up your HTML. No build step, no API keys, no backend needed.

Medium length section heading goes here
Lorem ipsum dolor sit amet, consectetur adipiscing elit. Suspendisse varius enim in eros elementum tristique. Duis cursus, mi quis viverra ornare, eros dolor interdum nulla, ut commodo diam libero vitae erat.
Medium length section heading goes here
Lorem ipsum dolor sit amet, consectetur adipiscing elit. Suspendisse varius enim in eros elementum tristique. Duis cursus, mi quis viverra ornare, eros dolor interdum nulla, ut commodo diam libero vitae erat.
Three steps to start
Publish your sheet, add the script, mark up HTML
Publish your Google Sheet
Make it public and share the link
Add the script tag
Paste before your closing body tag
Mark up your HTML
Use data attributes to connect elements
Get started now
Clone the template or jump to GitHub
See it working
Two live demos, no styling tricks
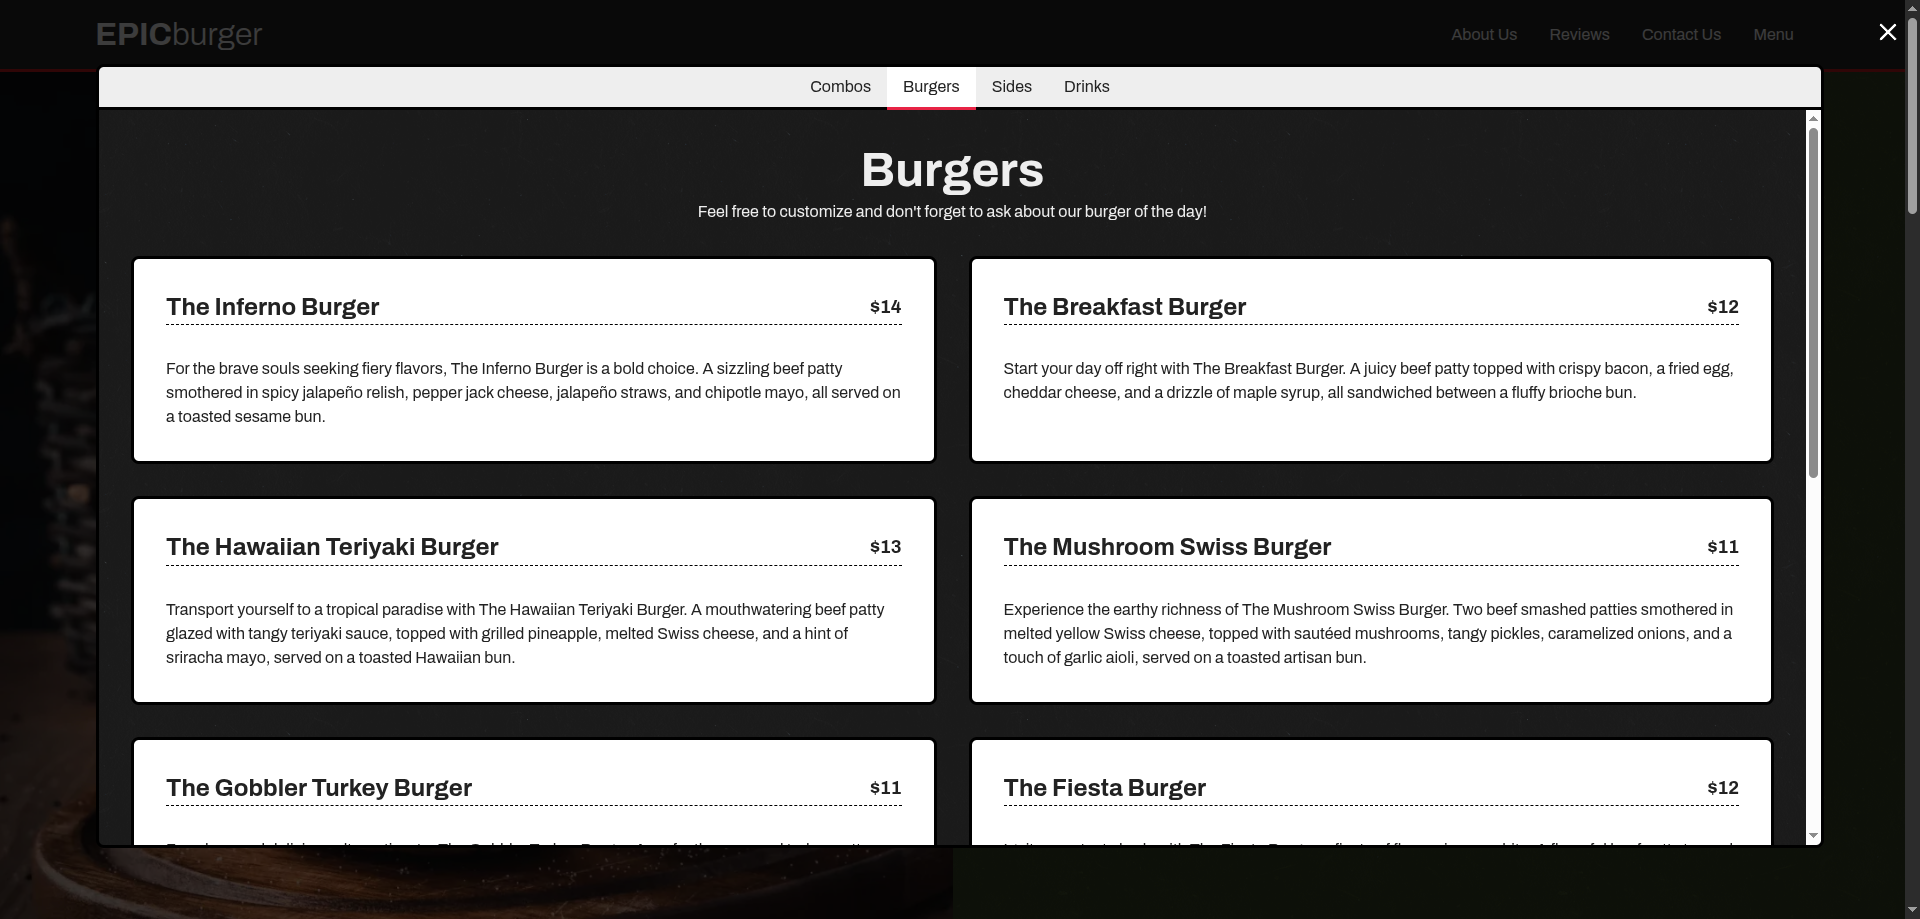
EPICburger
Check out the menu at the (fictional) EPICburger restaurant. Each tab is a tab in the spreadsheet, and all info is loaded straight from the spreadsheet. The hours of operation in the footer are fed from the spreadsheet "Hours" tab.

The Heritage Atlas
This site displays a full list of over 1,000 locations pulled from a spreadsheetin both on an interactive, searchable map and in a categorized tabbed list.
Include this before your closing `</body>` tag:
```html
<script src="https://cdn.jsdelivr.net/gh/cell2/cell2@latest/dist/cell2.min.js"></script>
```
Then mark up your HTML with data attributes to connect it to your sheet. Cell2 reads the sheet URL from the script tag's data-sheet attribute or from individual elements.
Your Google Sheet must be published to the web. Go to File > Share > Publish to web, copy the share link, and Cell2 will handle the rest.
- Set the data-sheet attribute on the script tag or on individual elements to point to your published Google Sheet URL.
- Use data-cell2-list to render a list of rows. Add data-cell2-item to the element that repeats for each row.
- Use data-cell2-map to render a map. Rows with latitude and longitude columns will appear as markers.
- Use data-cell2-tabs to create tabbed content. Each row becomes a tab, with data-cell2-tab-content for the panel.
Install
Cell2 works as a single script tag. No npm, no build step, no configuration file. Just include it and start using data attributes.
Basic setup
Add the script to your HTML:
```html
<script src="https://cdn.jsdelivr.net/gh/cell2/cell2@latest/dist/cell2.min.js"></script>
```
Then add data attributes to your HTML elements. Cell2 will fetch your sheet and populate the DOM.
Webflow
Paste the script tag into your Webflow project settings under Custom Code > Footer Code. Then use custom attributes on your elements to connect them to your sheet.
Plain HTML
Add the script tag before `</body>`. Use data attributes on any element. Cell2 will run automatically when the page loads.
Config sheet
Your Google Sheet is your config. The first row is headers. Each column becomes a field. Rows are records.
Example sheet structure:
```
name | price | description
Burger | 12 | Classic beef
Salad | 8 | Mixed greens
Pasta | 14 | Seasonal
```
Cell2 reads this and makes it available to your HTML via data attributes.
Attribute reference
data-cell2-list
Attach to a container. Cell2 will repeat the child element marked with data-cell2-item for each row in the sheet.
Example:
```html
<div data-cell2-list data-sheet="https://docs.google.com/spreadsheets/d/...">
<div data-cell2-item>
<h3 data-cell2-field="name"></h3>
<p data-cell2-field="price"></p>
</div>
</div>
```
data-cell2-item
Marks the element that repeats. Cell2 clones this for each row and populates data-cell2-field elements inside.
data-cell2-field
Specifies which column to pull from. Use the exact header name from your sheet.
Example:
```html
<span data-cell2-field="name"></span>
```
data-cell2-map
Renders a map. Requires latitude and longitude columns in your sheet. Uses Leaflet and OpenStreetMap.
Example:
```html
<div data-cell2-map data-sheet="https://docs.google.com/spreadsheets/d/..."></div>
```
data-cell2-tabs
Creates tabbed content. First column becomes tab labels. Use data-cell2-tab-content for panels.
Example:
```html
<div data-cell2-tabs data-sheet="https://docs.google.com/spreadsheets/d/...">
<div data-cell2-tab-content>
<p data-cell2-field="description"></p>
</div>
</div>
```
Caching
Cell2 caches sheet data in localStorage for 5 minutes by default. This reduces API calls and speeds up page loads.
To disable caching, add data-cell2-cache="false" to your element.
To clear the cache manually, call `window.cell2.clearCache()` in your browser console.
Gotchas
Your sheet must be published to the web. Private sheets will not work.
The first row must be headers. Cell2 uses these as field names.
Column names are case-sensitive. Use data-cell2-field="name" not data-cell2-field="Name".
Empty cells are treated as empty strings. Use a dash or placeholder if you need a default value.
Maps require latitude and longitude columns. If missing, the map will render but show no markers.
Cell2 runs on page load. If you add elements dynamically, call `window.cell2.refresh()` to update them.
Large sheets (1000+ rows) may be slow. Consider filtering or splitting data across multiple sheets.
CORS is handled by Cell2. You do not need to configure it.